

DENIM AND BONE
diy
Denim AND Bone DIY: THE WILDFLOWER WANDERER HAT
We’re back with the next instalment of Denim & Bone DIY, and this time we’re transforming a simple hat into something completely one of a kind.
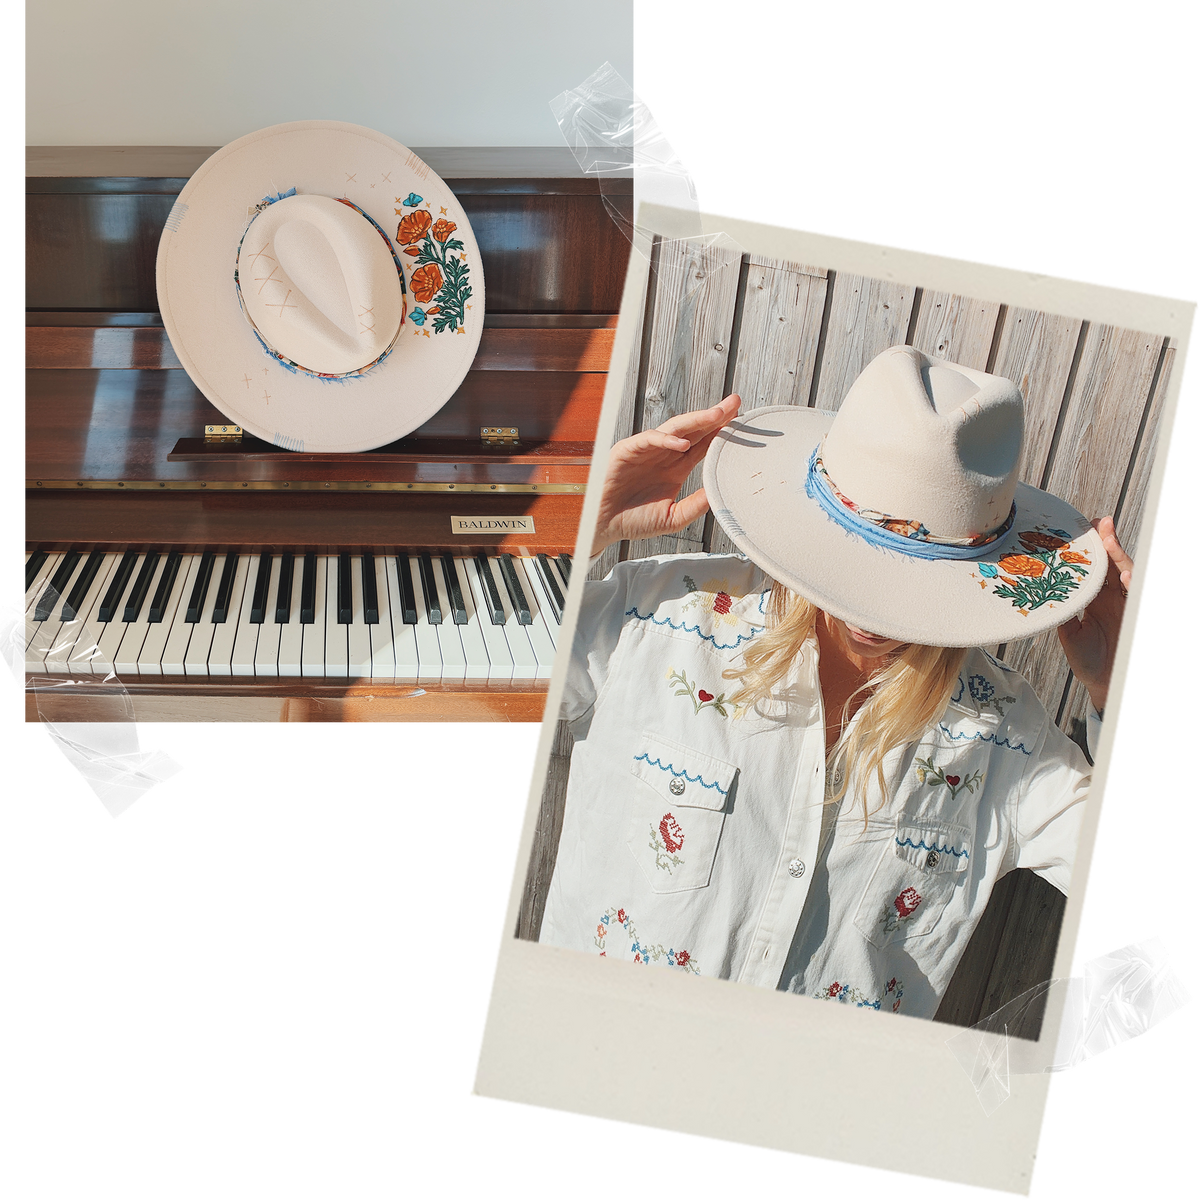
I wanted this design to feel a little bit western, a little bit folk art and very Denim and Bone, so I combined hand painted flowers, butterflies and starry gold details with embroidery and strips of colourful fabric.
The beauty of this DIY is that you can make it entirely your own. Use the colours, motifs and embellishments that you love and don’t worry about making everything perfect. The hand-drawn details are all part of its charm.
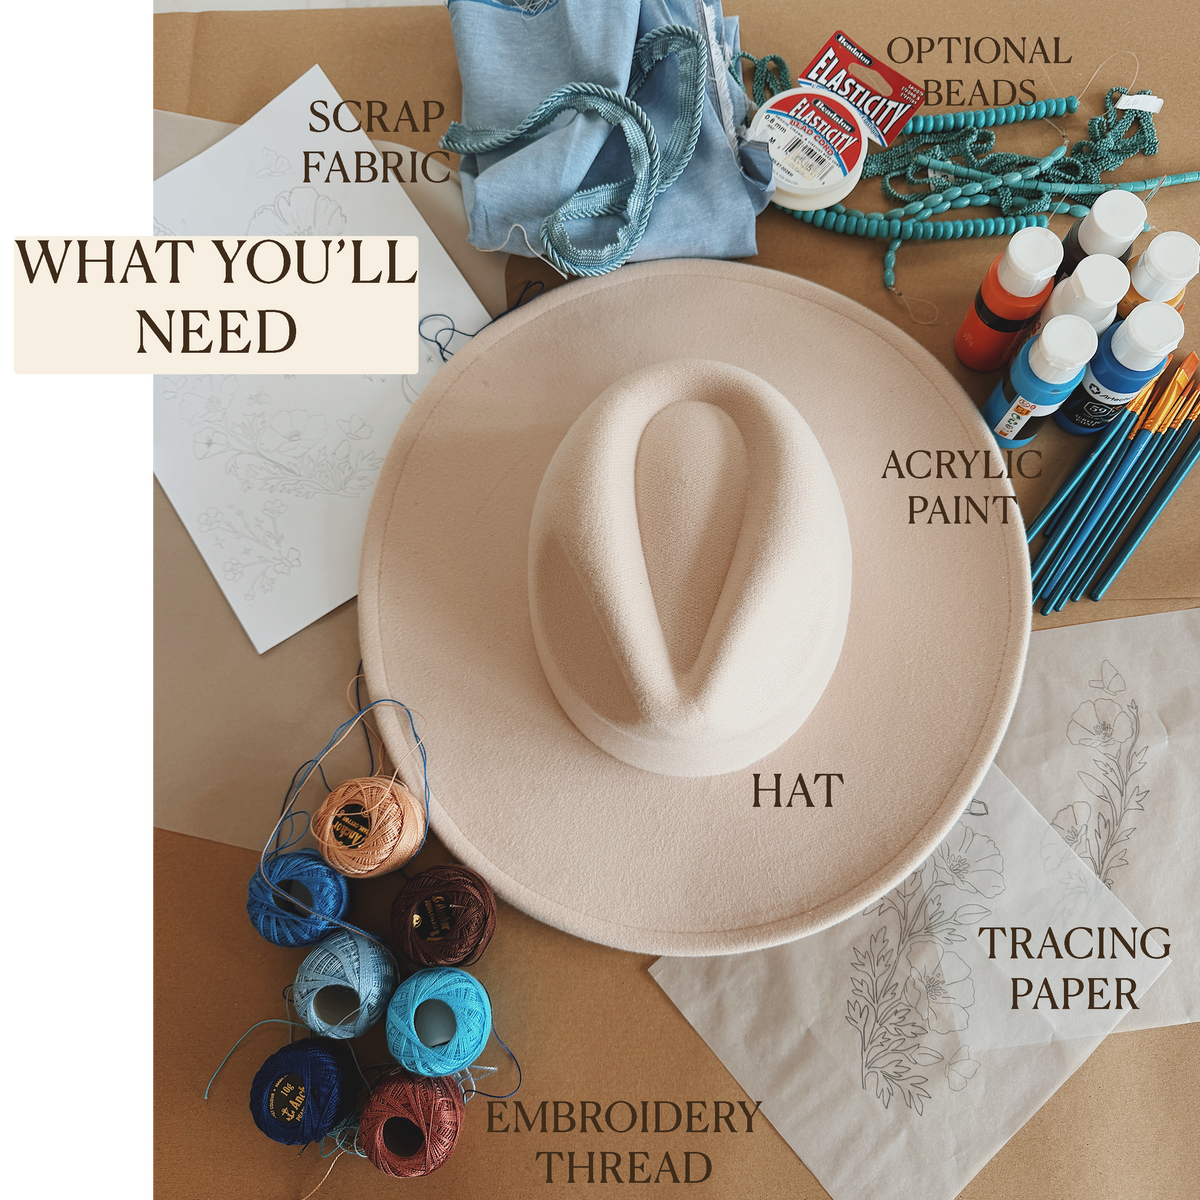
WHAT YOU'LL NEED
– A plain hat
– Paper and a pencil
– Tracing paper
– Tape
– A pin or thick needle
– A fine pen
– Paint suitable for your hat’s material
– Fine paintbrushes
– Metallic gold paint
– Embroidery thread
– An embroidery needle
– Scraps of patterned fabric
– Scissors
– Optional beads
– Jewellery wire or clear beading cord
STEP 1
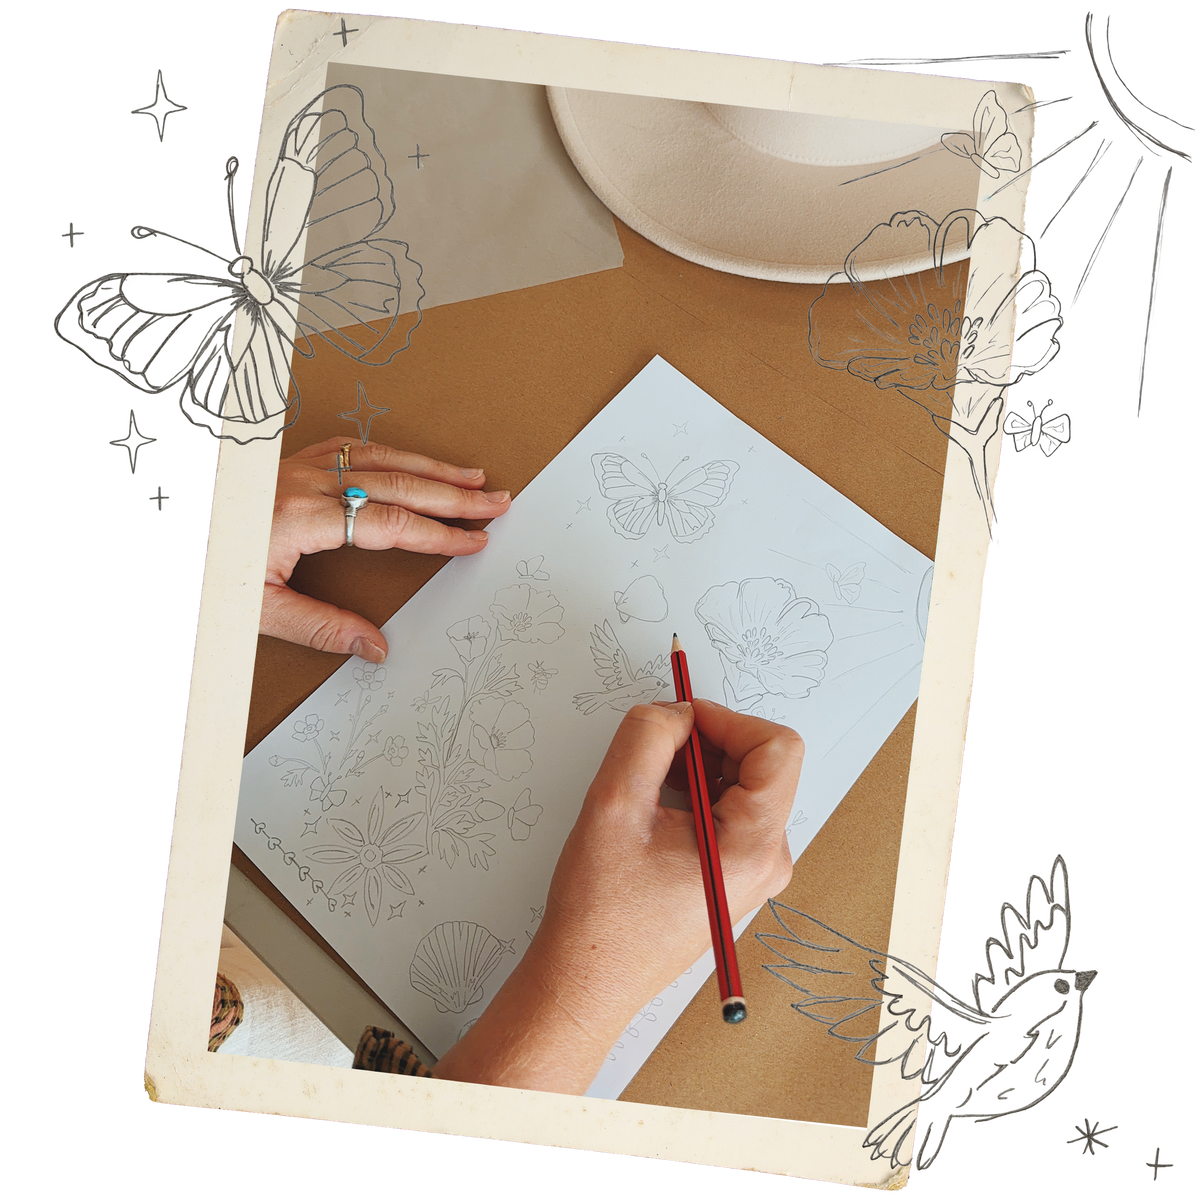
Sketch Your Ideas
Begin by sketching out a few ideas on paper. I chose California poppies, a blue bird, butterflies and little celestial details, but this is your chance to make the design personal to you.
You could use flowers, hearts, stars, moons, birds or anything else you love. Think about how the design will wrap around the shape of the hat and try not to overcrowd it—you can always add more details later.
STEP 2
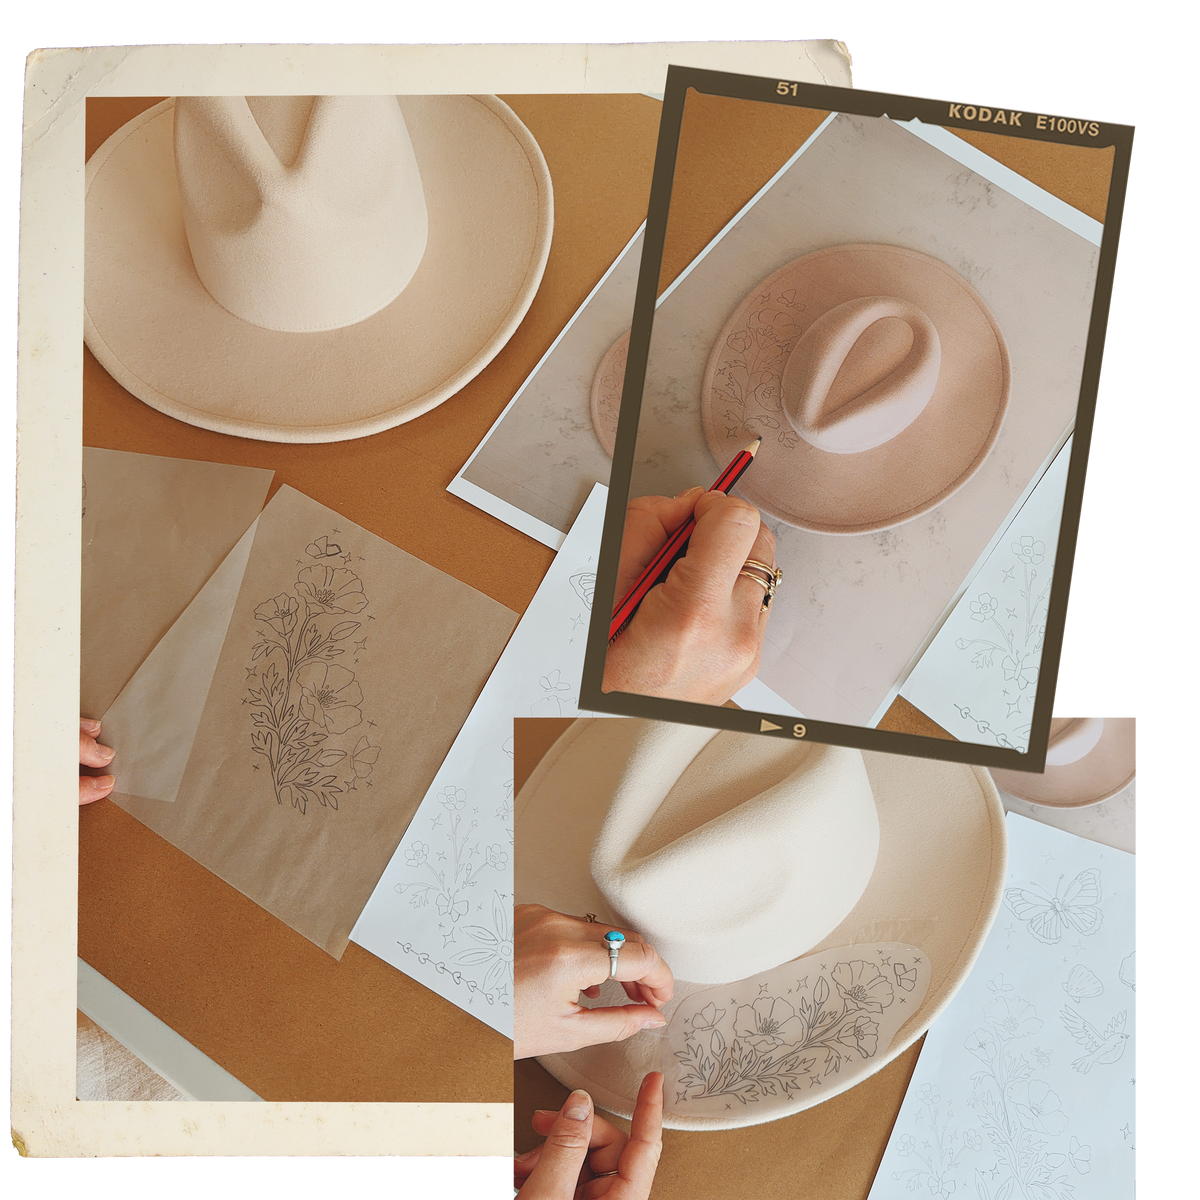
Trace Your Design
Once you’re happy with your drawings, trace each motif onto tracing paper.
Cut loosely around the designs, then position them on the hat. Move everything around until you’re happy with the placement before securing the tracing paper with a little tape.
STEP 3
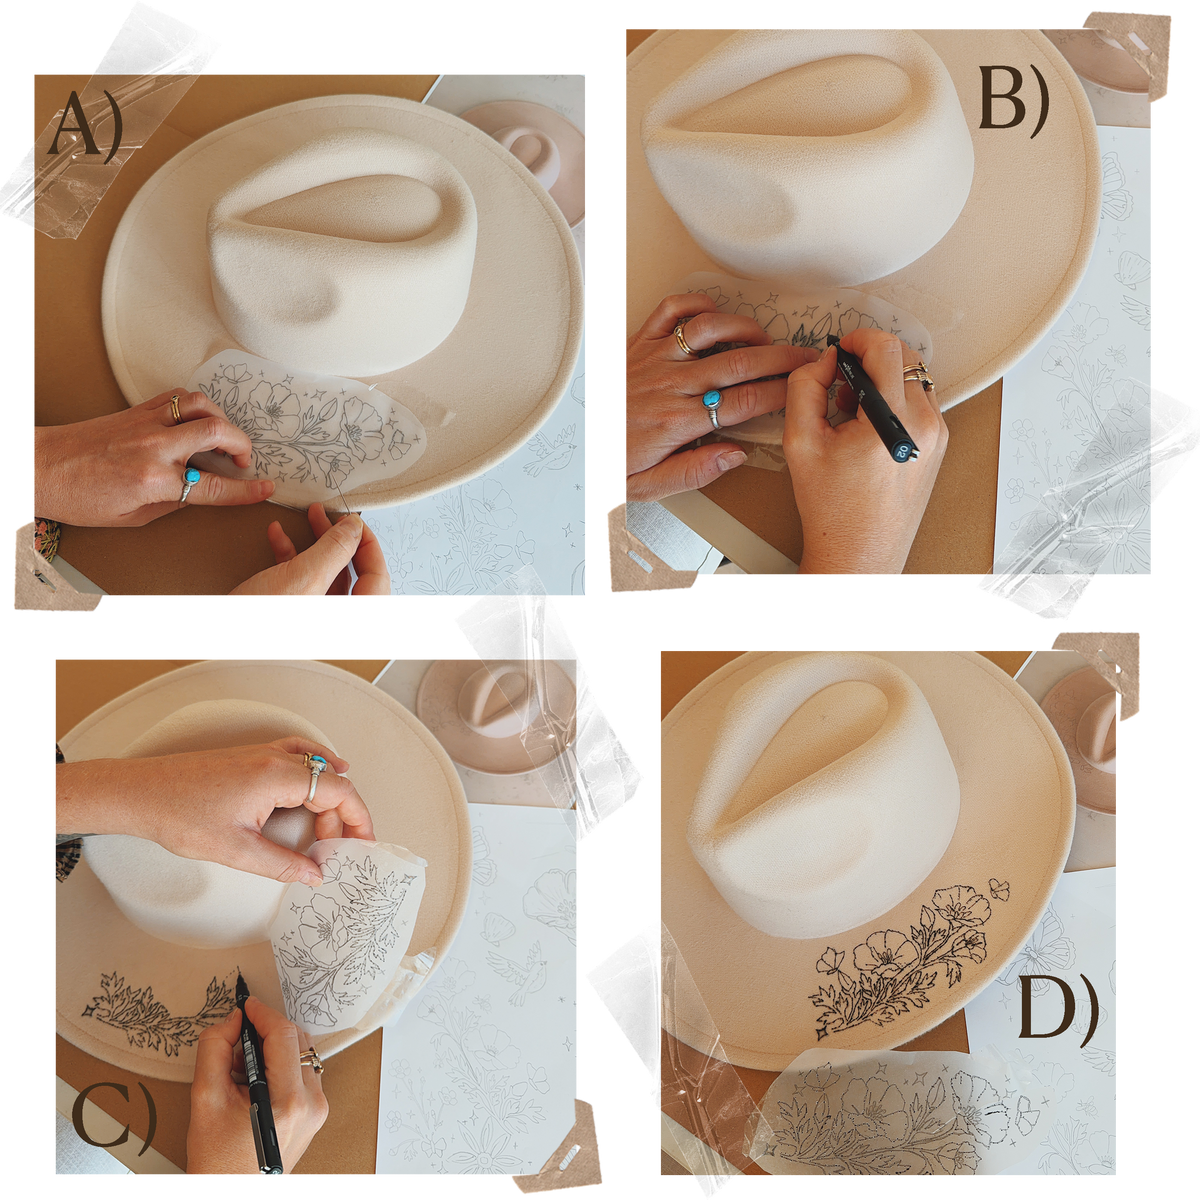
Transfer the Design
With the tracing paper secured in place, use a pin or thick needle to puncture small holes along the lines of your design. Keep the holes fairly close together, particularly around curves and smaller details.
Remove the tracing paper and use a fine pen to carefully mark through each hole, joining the dots as you go to recreate the design.
My top tip is to join the dots as you work. It can become a little confusing if you mark every hole first and try to connect them all at the end! Don’t worry if the lines aren’t completely perfect, as most will be covered with paint and the hand-drawn finish is all part of the charm.
STEP 4
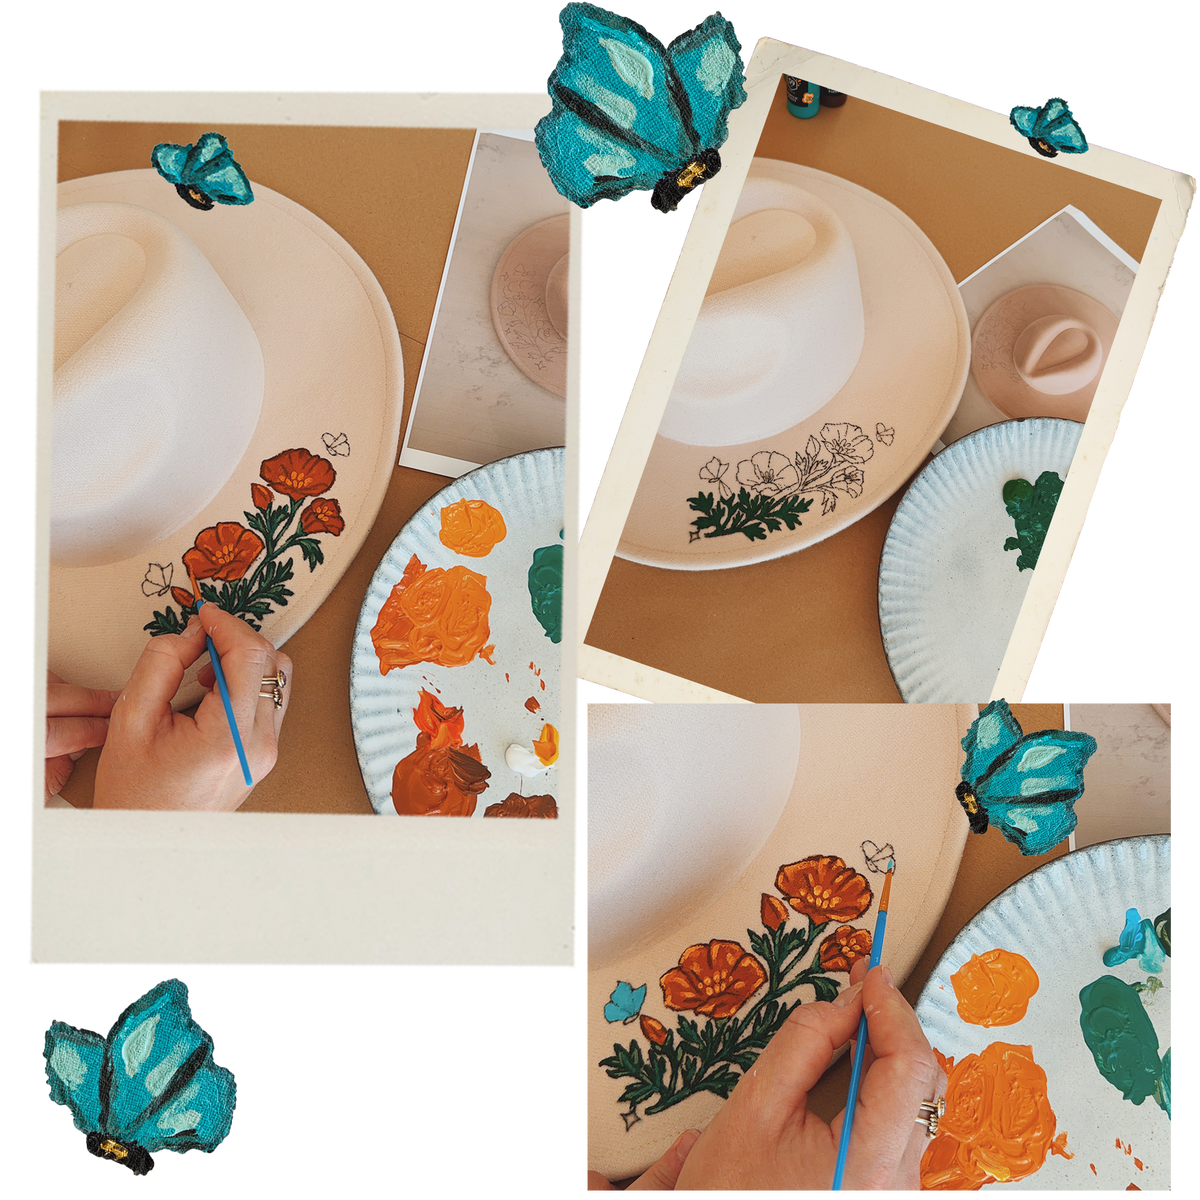
Paint Your Design
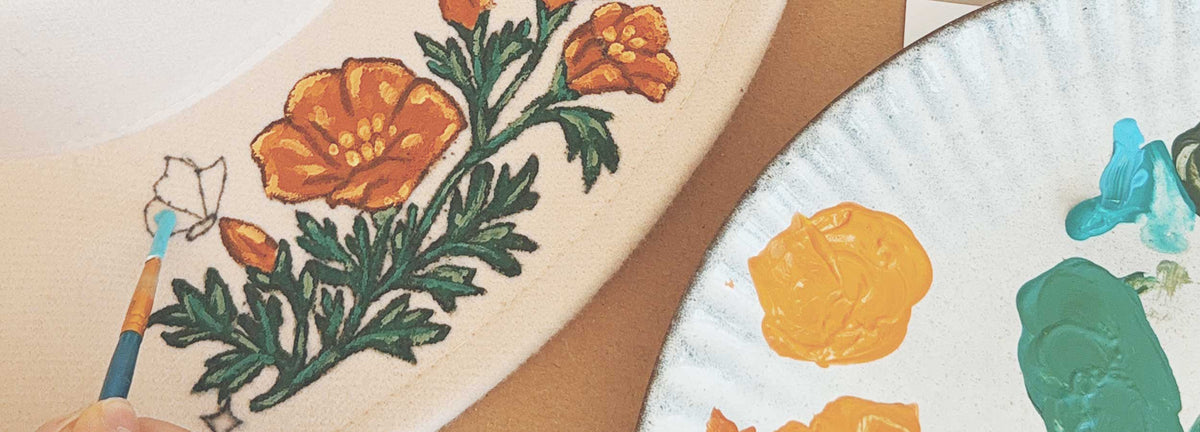
Now it’s time to paint. Begin by filling in the main areas with your base colours, using a small amount of paint and building it up gradually. Depending on the material and colour of your hat, you may need a couple of coats, just allow each layer to dry before adding the next.
Once the base colours are dry, add lighter and darker shades to create highlights, shadows and depth. Fine brushstrokes will give the flowers, bird and butterflies a more painterly feel and help bring the design to life.
This part doesn’t need to be too precise. Layer the colours gradually and stop when the design feels finished to you.
STEP 5
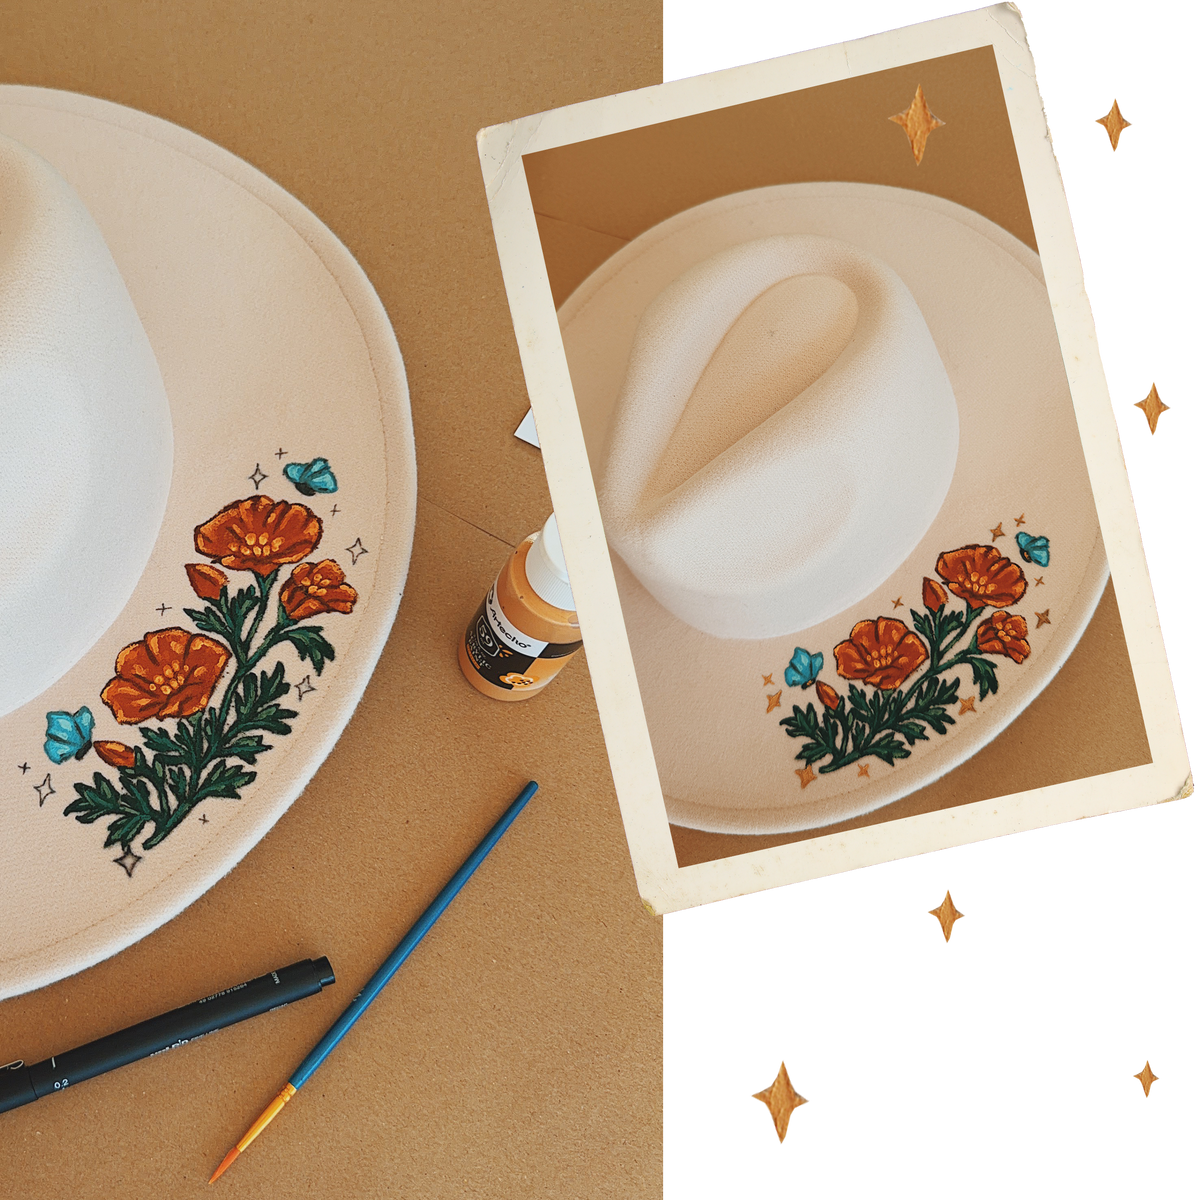
Add the Golden Details
Next, I drew little stars and celestial details by hand before painting over them with metallic gold.
These smaller details are perfect for filling any spaces between the larger motifs and helping the whole design flow around the hat. They also catch the light beautifully and add a little bit of Denim & Bone magic.
STEP 6
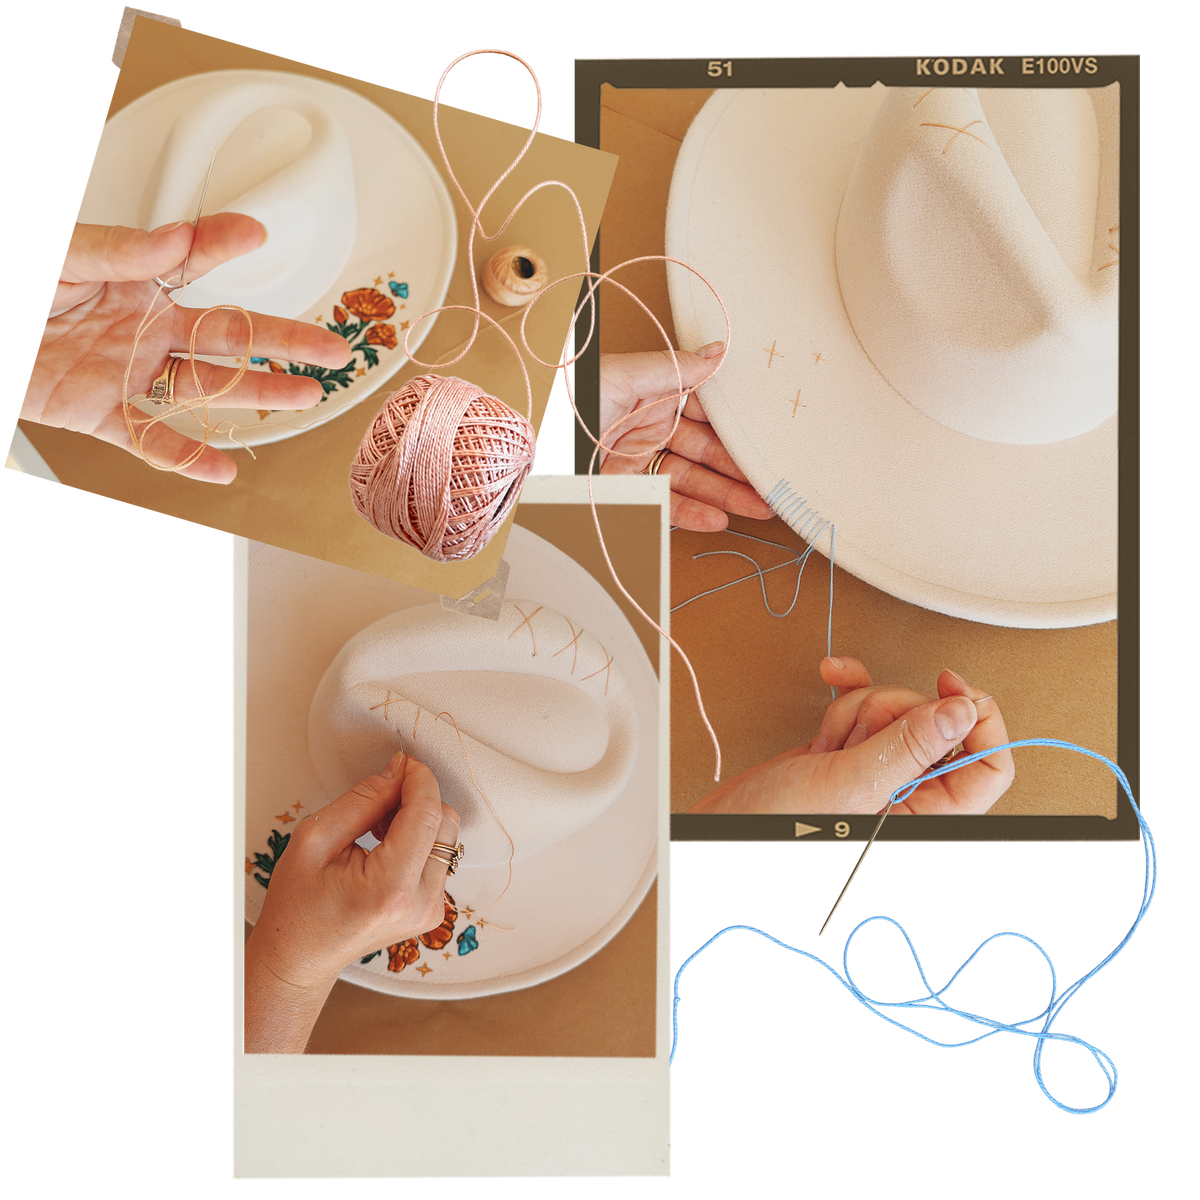
Embellish with Embroidery
Once the paint is completely dry, use embroidery thread to add stitched details.
I added small crosses and a little embroidery around the edges of the hat. You can keep this very simple or add as much as you like, the aim is to create texture without taking away from the painted design.
Take extra care when pushing the needle through a thicker hat. A thimble can be helpful if the material feels particularly firm.
STEP 6
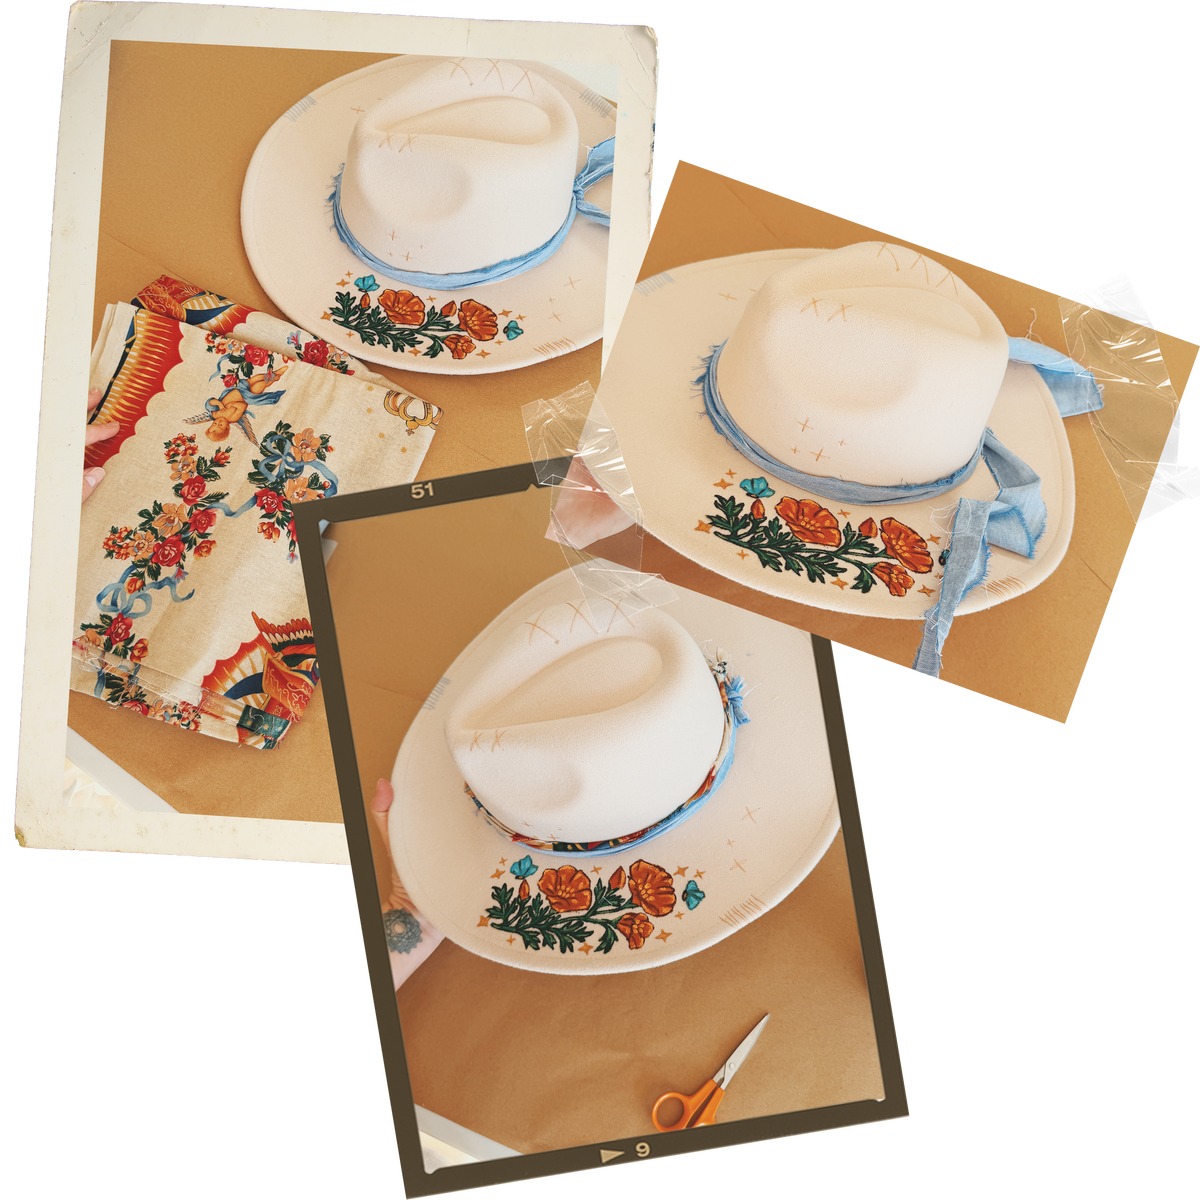
Add the Finishing Touches
To finish, I tied strips of scrap fabric around the back of the hat. Mixing different colours, prints and textures gives it a relaxed, layered feel and makes it a lovely way to use leftover fabric.
You could leave the fabric edges raw for a softer, more bohemian finish or trim them neatly if you prefer.
For one final optional detail, thread a few beads onto jewellery wire or clear beading cord and attach them alongside the fabric strips.
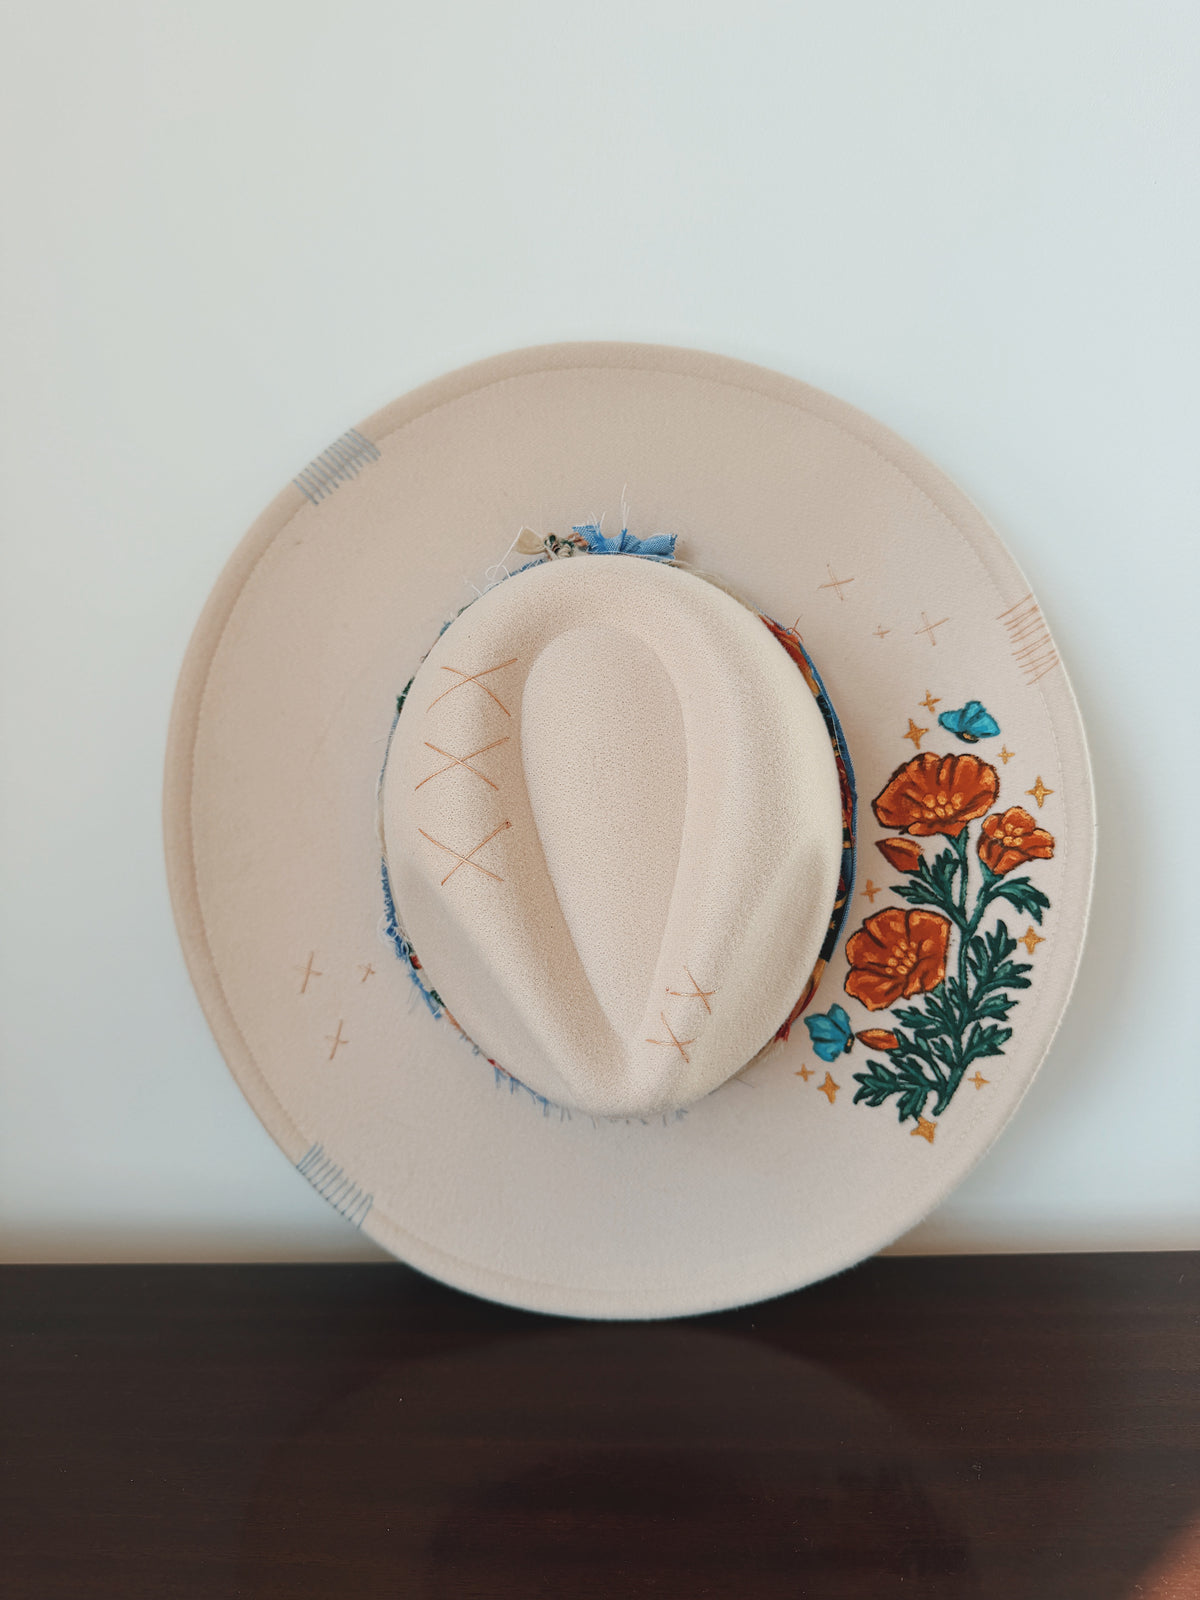
The finished hat is a little bit western, a little bit folk art and completely one of a kind. Just how we like it!
How We’re Styling Our Hat
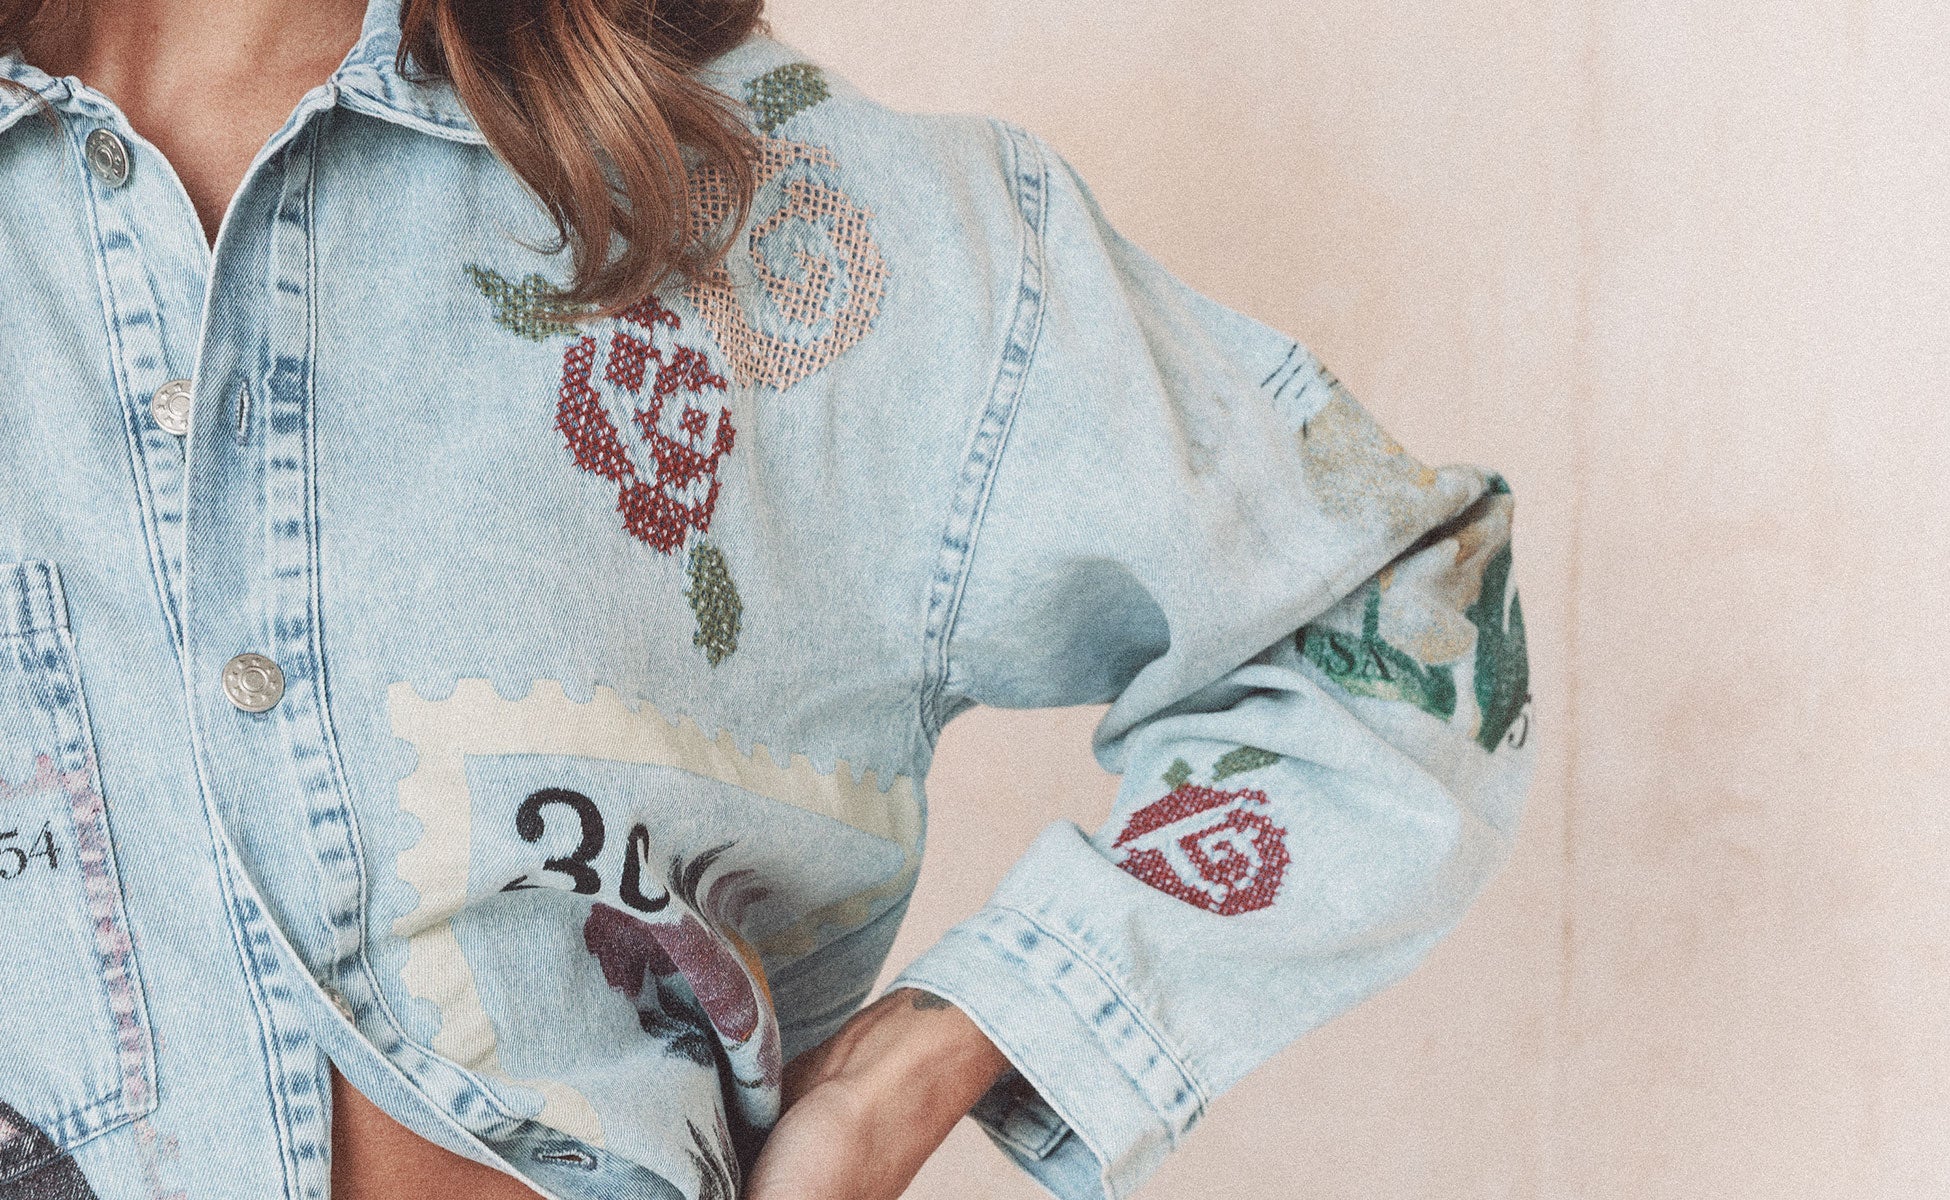
We’re pairing our hat with a relaxed Denim and Bone shirt and statement shorts for an easy, colourful look with a little western spirit.

Made one of your own?
We'd LOVE to see it. Tag @denimandbone on socials so we can see your creations ✨
happy creating, Love daisy x
SEWN WITH PURPOSE
INSPIRED BY ADVENTURE
GOOD VIBES ONLY
DESIGNED TO BE KEPT